Saturday, April 30, 2016

Heidi Swapp - Adored

Hey friends
 
 
So a couple of weeks ago I dug into my stash and pulled out an older Heidi Swapp paper pad.  I'm a real shocker for buying paper and then it sits in my cupboard and after a few months I loose interest and no long want to use it.  This year I have decided that I really need to use up those papers.
 
At first I was a little stumped as I didn't have any matching embellishments so I had to rummage around in my stash and see what I could come up with.
 
Here is the result
 
 
I made a small cluster of tags with some left over Kaisercraft collectables and also used my Couture Creations Feather die which I embossed with some gold glitter embossing powder.
 
A couple of punched hearts and some enamel dots and I finished it with that really sweet resin camera.  That was from Delish Scraps - love that place for really sweet embellishments!
 
Thanks for stopping by
 
Have a wonderful weekend
 
Hugs
 
Jo


Friday, April 29, 2016

Cards with Spellbinders

Hello crafty peeps!
 
 I thought I would share with you what I have been creating this week.
 
I have pulled out a couple of Spellbinder dies and created these cards.
 
 
My first die set with the Spellbinders Floral Assortment die set.
 
Here is my first card.
 
I added some pretty Prima paper to my card and some flowers.


My daughter informs me that she thinks this is a bit "Wedding like"  I think she is right but I really like just the white and gold foil board.  So simple and elegant.


The second die set is Card Creator - 5 x 7 Elegant Labels 4
 
Here is the first card I made.


I love how with just a bit of plain cardstock and some pretty flowers you can create a card really quickly and without too much thought.
 
Here is my second card.
 
So for this card I cut out the centre piece and teamed it with a couple of my favourite Couture Creations dies for some extra detail.


Thanks for stopping by.
 
Have a wonderful weekend. 
 
Crafty hugs
 
JO

Wednesday, April 27, 2016

Love Is All You Need - with Magnolia Lane

Hi there.  Jo here to share with you a layout I created using the Magnolia Lane range of papers.
 
 
This layout was super quick and easy.  I have gone back to some cleaner lines of scrapping lately and am really happy how this one turned out.  I love love love all the mixed media style that is around at the moment but when the papers are so pretty like this I just can't bring myself to  cover them up with inks and paints.
 
Anyway onto my layout.  First I matted some Pandora cardstock onto some Snow White cardstock.  I then trimmed my patterned paper down to 11 inch x 11 inch and laid that onto my Pandora cardstock.  The patterned paper I used with the Rosehip Memories page  I like how it has the script already printed onto it so I don't need to add anything but yet it looks kinda mixed media.
 
 
I then cut from my scraps 2 inch x 2 inch squares.  I added a little ink around the edges and also hand stitched them.  Once that was done I matted them onto the Pandora cardstock

 
I then prepared my flowers.  To do this I used the Clavina Layers die and die cut out a heap of petals using velum.  Using velum made them look soo soft and dreamy.  To add a little texture I then ran them through my Big Shot using the Magnolia Lace embossing folder.  I added a brad to keep them together and gave them a little pinch in the middle to fluff them up a bit.


Next layout your squares and photo and adhere to your page.


Add your embellishments and your done.  I added the tassels die and popped a little bit of that cardstock underneath to make them pop a little.  Using some of the AWESOME glitter paper that Couture Creations now have I die cut my leaves from the rose cutting die.  This glitter paper is just the best.  It cuts without any dramas out all!
 
To finish off I stamped in the bottom corner my title and also a butterfly to cut out and pop in with my flowers from the Timeless Garden stamp set.
 
Here is a closer look at the embellishment cluster.


Thanks for stopping by
 
Happy crafting


Ultimate Crafts Products used

 Magnolia Lane Dies Used
ULT157523 - Rose Cutting
ULT157519 Tassles
  
Couture Creations Products Used
 
Tools used
 
Adhesives used


Thursday, April 14, 2016

Magnolia Backdrop

Thanks for popping by!
 
Today I'm sharing a couple of cards using the same die but with different results.
 
The die I am using is the Coordinating Magnolia Backdrop.
 
 
For my first card I die cut the frame out and then matted it onto some velum.  Working on the back side, I colour the two big magnolia's for a bit of extra effect.  This gives it a lovely soft look.
 
Before attaching it to my card base, I cut the middle out of the front of it so that it still appears transparent.


For my second card, I again cut the die out and then used it as a stencil to create my background paper.  I then layered over the top the Magnolia Doily die.  Place a blossom in the middle and add the leaves from the Rose Cutting die.
 
A bit of bling is always need so I cut pieces from the Bling and Pearl Flourishes


Until next time
 
 
Ultimate Crafts Products used
 
Tools used
 
Adhesives used


Saturday, March 19, 2016

Twisted Easel Cards

Hello!  Jo here to share two cards with you, using the Magnolia Lane dies and papers.
 
My two cards are twisted easel cards, tho they lay flat for postage.


These cards are easy to make.  Cut your card to the size you want but I does need to be square.  I cut mine to 5 inches x 5 inches.
 
Then fold the cover of your card on the diagonal to leave a triangle.  Then you need another piece of 5 inch x 5 inch card to make your card front.
 
For this card I have just layered up a few of my favourite dies from the Magnolia Lane range.  Ok confession - all of them are my favourite.  I absolutely love this  square lacey frame that is on this card.  Its called Square Magnolia Frame and it has received a hammering since I have got it.
 
So first I layered my paper then the lacey square frame.  I then layed the Magnolia Doily over the top of that.  The little lacy square that the rosette is sitting on is from the insert of the Square Magnolia Frame so I then placed that on.  Added my rosette and teamed it up with the leaf from the Rose Cutting die.  I added the butterfly from the ephemera back and some gemstones.


So with my second card, I chose not to have a full back piece.   I just covered the triangle piece of the card and then layed my Square Magnolia Frame.  I wanted to use the Rosey Frame die but it got a little lost on its own so I placed it on to a circle that I cut from the nestig dies.  I added a little bit of ink around it just to make it pop a little.  I then added my paper magnolia in the middle.
 
Again I have added my butterflies from the ephemera pack and for my sentiment I used the Thank You Tag Set die.
 
 
Here's a little look at how they look when they are folded down ready to post.

 
Thanks so much for stopping by and for all the lovely comments.  They are truly appreciated!
 
Until next time
 
 
Ultimate Crafts Products used
Tools used
 
Adhesives used


Thursday, March 10, 2016

Blue Fern

Hello paper friends!
 
Just the last few months I have fallen totally in love with Blue Fern products.  I love their paper and chipboard and they have some stamps that are just divine.  I'm now waiting to get my hands on some if their new embossing powders.
 
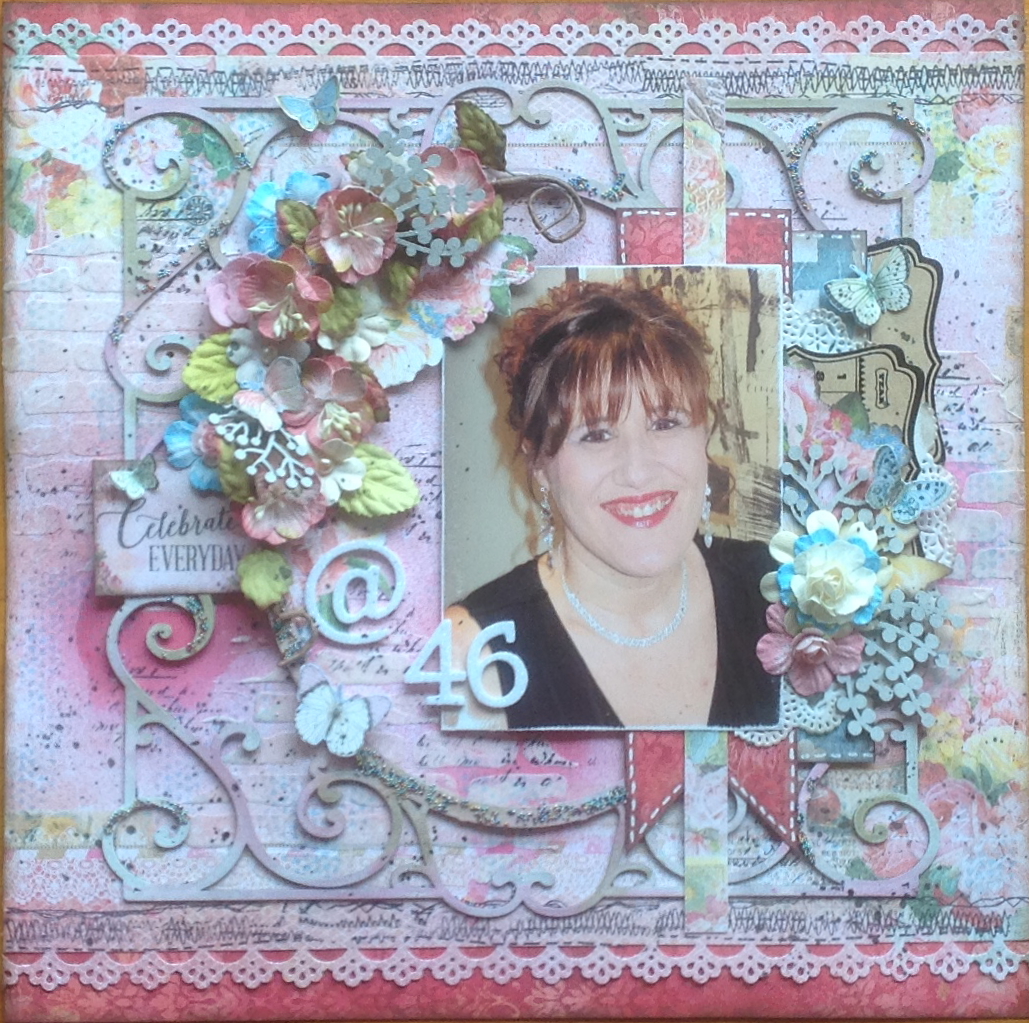
Any how here is a page a created with some of their paper range.
 
 
I NEVER EVER scrap pics of myself.  I know it will be important for my kids to have them later on so I really need to make a bit more of an effort.  I was really pleased with how this turned out.  I have used an old Twiddleybitz frame and also had a bit of a play with some microbeads.

I have also done a little stenciling and some stamping and spritzing.
 
I love these kind of layouts - packed to the brim with goodies but I have been trying recently to "tone" them down a little too.  I'm really enjoying working on white backgrounds and keeping it simple but I do love it when I get the opportunity to just go nuts and chuck everything including the kitchen sink on to a page.
 
Thanks so much for stopping by
 
Until next time


Tuesday, March 8, 2016

A Ladies Diary - G45

Hello and welcome!
 
So I was going through a bunch of photos on my computer and discovered a whole heap of layouts that I have created but haven't yet shared.
 
This one is a favourite.  It came about from the last of my scraps from the G45 papers A Ladies Diary
 
 
I fussy cut out some of the pretty elements including that divine lady on the right hand side.
 
Added some Blue Fern chipboard and some bling.   I also punched around the edges to give it a lacey feel.  I love G45 papers but really struggle to cut it up so I was so happy that I finally managed to use it all up.
 
Thanks for stopping by.
 
Until next time