Monday, September 18, 2017

Thank you and goodbye

Hello beautiful people!


Today I say goodbye. What an amazing ride it has truly been.  I will be forever thankful for every opportunity that I have been given.  I started with the team in 2013 and the last few years have been truly one of the most rewarding experiences I have had.
 
To each and everyone of you that has followed my creative journey, left me beautiful comments on my work - I say a massive thank you.  Every one of your comments were read and meant so much to me. Thank you for allowing me to share my love of paper craft with you. It has been an absolute honour and a joy to get to know you.
 
I will still be around creating, its in the blood so please feel free to "friend" me on Facebook if you want to keep up with my scrappy adventures.  For the immediate future, I am hoping to continue teaching classes and inspire those that share the same love as I do.
 
To everyone that I have had the pleasure of working alongside of on the team at various stages - thank you from the bottom of my heart.  Your love, support and most importantly your friendships are invaluable
 
Finally I can not thank Artdeco enough for taking a chance on me.
 
Today I thought I would take you for a little walk down memory lane and share with you some of my fav pieces of work over the last few years.
 
This is were it all started!  This was my very first blog post for Couture Creations.  Yep I still have these cards packed away! 


This layout will always be special to me.  This was the layout I designed and taught at Creative Inspiration Live.  What and adventure!  What a truly wonderful experience!  So many friendships made and happy times to cherish.
 
 
I have a bit of a soft spot for embossing folders and this one fast became a favourite.  Called Joe's Garden - maybe its the name? LOL


These cards are using the beautiful Vintage Rose papers.  I still remember how excited we all were when we released this paper line. We hadn't been doing paper for very long and this was so exciting!
 
 
Now this one is a long way back from the archives.   This was a stamp and emboss set.  Lots of fun and I love that stamp!

 
With a good embossing folder you can make anything.  Another favourite - Tied Together


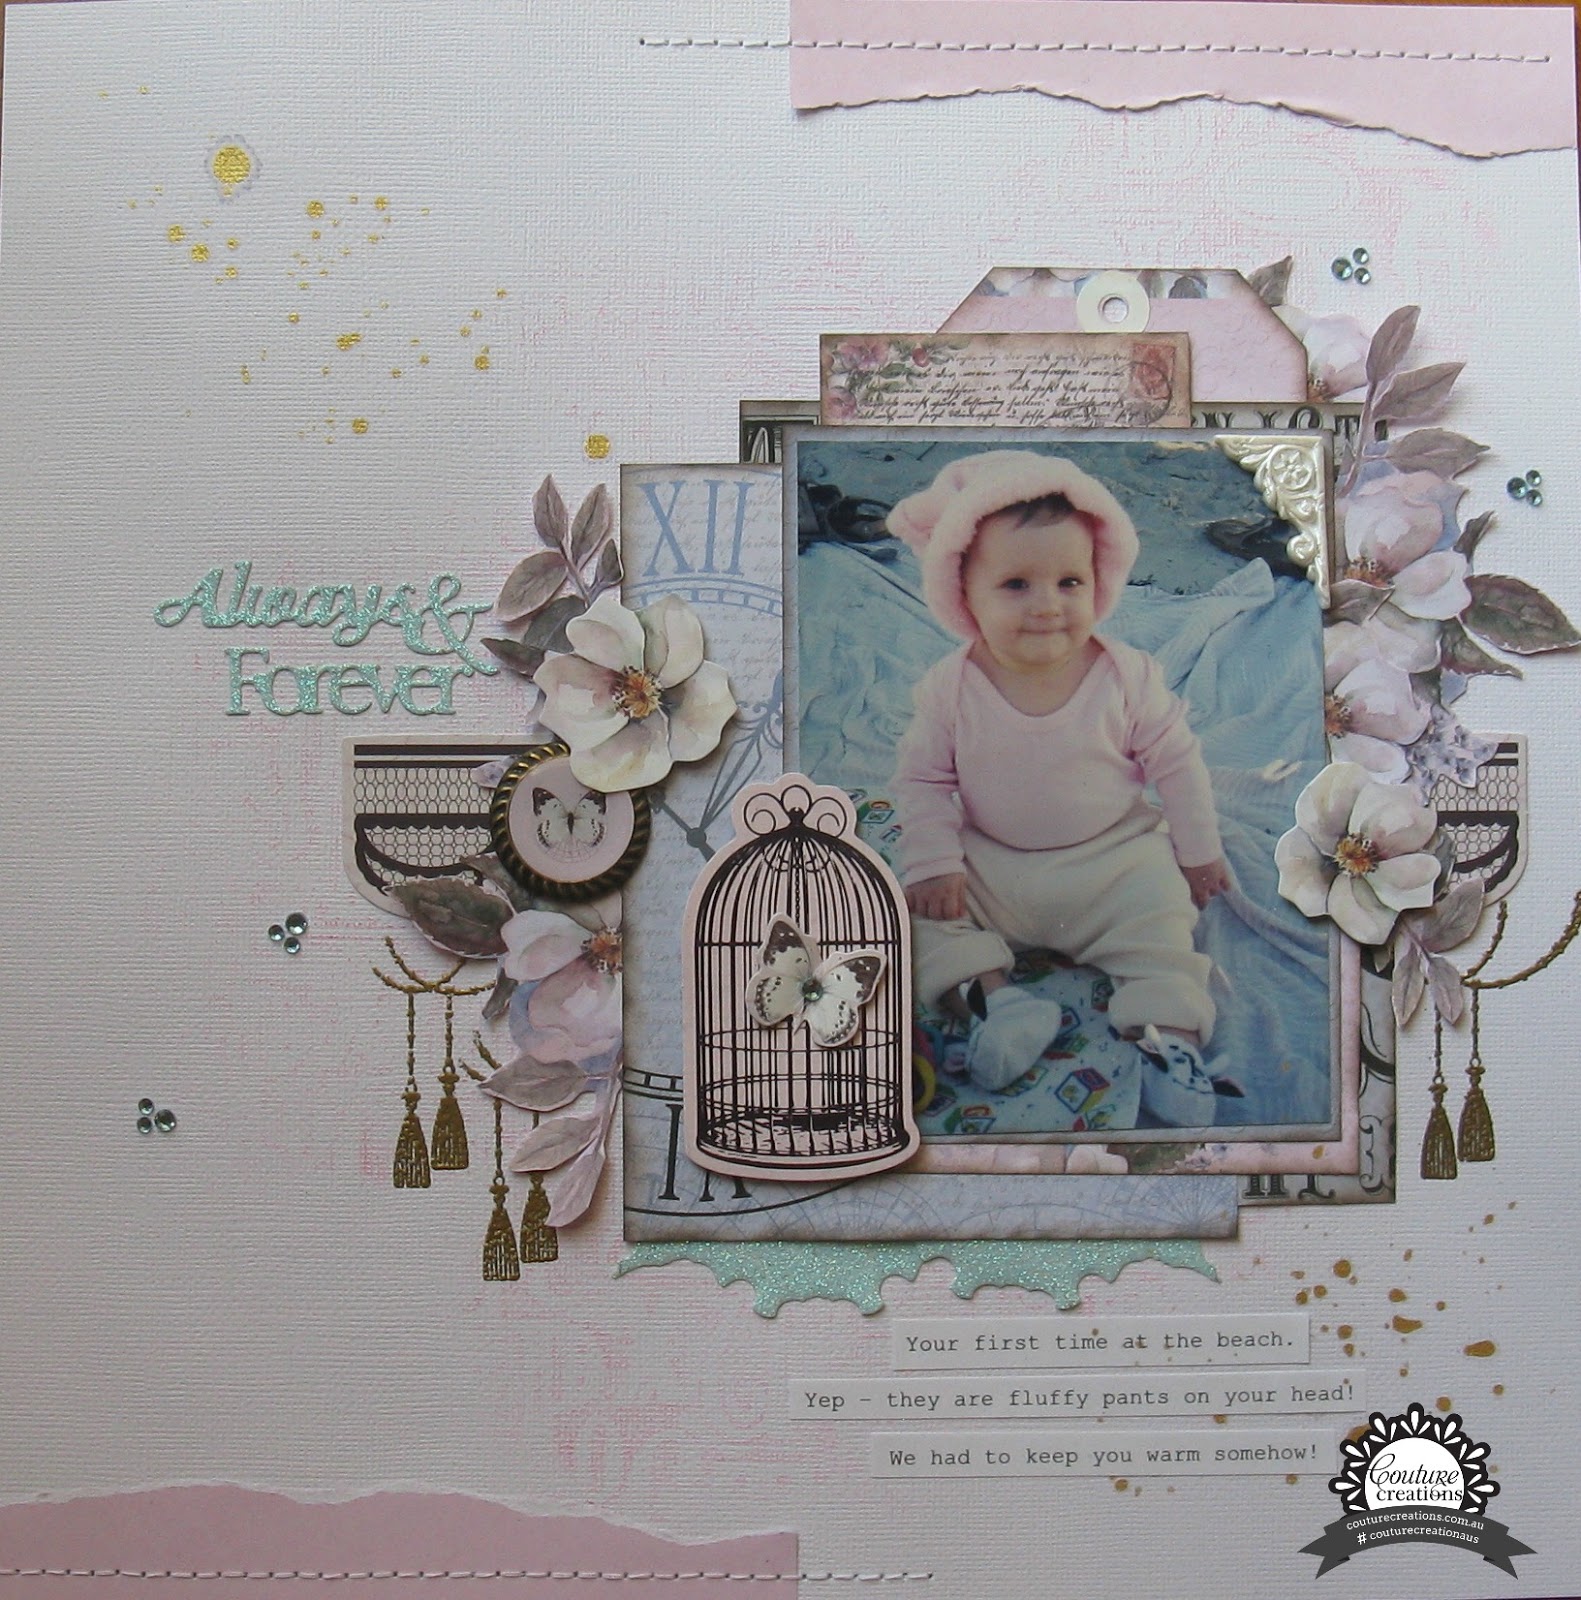
Oh Sue Smyth!  I fell in love with this range - Magnolia Lane. I think this is probably my favourite range.  Yep those pretty soft pinks get me all the time.


Always up for a mini album.  These are my favourite things to make


Die cut n bond - my best friend!  Making these acetate cards was a breeze using this stuff.  These are dies from the On The Edge collection

 
The Ritz - so far out of my comfort zone but I grew to really enjoy working with this collection


Another beautiful paper line Hearts Ease by the super talented Denise Boddey


These are my all time favourite cards I made for Couture Creations using the Ooh La La collection


Was really pushing the boundaries here!  Mixed media - what was I thinking! This was with the Vintage Christmas collection


Another with the Ooh La La paper line

 
The Sea Breeze collection had those "bathing beauties" in the collectables and I was determined I was going to use them in a layout somewhere!

 
Oh I do love a good doily and fussy cutting.  Super pretty Enchanted Tea Party!

 
Laquarelle collection - somehow I think I made flowers and a boy page work
 
 
A sweet treat box.  This was a lot of fun!

 
That's it my dear friends!
 
Thanks for the memories
 
Keep crafting


Wednesday, September 6, 2017

Moments - Bohemian Bouquet

Hello! Jo here today sharing with you another 8.5" x 11" layout with you.
 
I must say I have really enjoyed the smaller pages.
 
Today I am working with the oh so pretty Bohemian Bouquet.


For this layout I have used the 6 x 6 paper pad and teamed it up with some of the chipboard from the collection.
 
For some sparkle I have cut out the Wrought Iron Frame Die from glitter paper.


Here is another close up.
 
The decoupage flowers were perfect for layering under my paper cluster


Thanks for popping by
 
Until next time
 
 
Products used


Monday, September 4, 2017

Card with the Ritz

Hello!  Jo back again today to share with you some really super quick and easy cards using the Ritz collection.
 
 
This collection has come in really handy for the cards and layouts for men but there is also some lovely gold foil images for the ladies too.


That's it for today.  Just a quick post showing you how versatile this collection is.  Be sure to pop back soon and I will share with you some of the other male cards I have made.
 
Until next time
 
 
Products used


Wednesday, August 16, 2017

Bohemian Bouquet Card

Hello crafters!  Jo here with you today to share a card using the new Bohemian Bouquet collection due for release later this month.  I was also playing with some embossing paste.  This paste works beautifully in silicone moulds.


Here is how I create my frame.  I simply spread some of the embossing paste into the mould and let air dry.  I find this works best if left over night.
 
They then just slide out of the mould and are ready to be prettied up.
 
For my frame, I mixed a bit of the pink pigment powder with some liquid hairspray in a small bottle and then spritzed my frame.  When that was dry I added in random spots some glue, using the 2 way glue pen.  Let it dry a bit but still a little tacky and then dab scraps of gold foil over my frame


I then teamed it up with some of the papers from the Bohemian Bouquet paper range and the Speckled Flowers embossing folder.  I matted my papers onto the stunning gold line gold papers.  Adhered my frame and added my small flower cluster at the bottom.

 
Thanks for stopping by
 
Until next time
 
 
Products used
 
ULT158031 - Bohemian Bouquet 6 x 6 paper pad


Wednesday, August 9, 2017

Let Every Day Be Christmas with Couture Creations

Hi and welcome back!
 
Today I have a quick layout to share with you using the super pretty Let Every Day Be Christmas collection
 
 
So recently I have really been on struggle street with my creativity.  I think we all have periods of time like that!  Looking at a full size 12 x 12 piece of paper was totally overwhelming me. So - I decided to have a go at an A4 size.  It was perfect as it allowed me to go  nuts on my clusters and layering that I love but not have to worry about a full size page.
 
Here is a close up.
 
I layered some papers from the A4 paper pad and also tucked under some of the ephemera.
 
The collection also come with some stunning chipboard.  I have used that gorgeous frame and inked it in gold and the small sprigs I have embossed in gold embossing powder.  Added some flowers and pearl clusters and BING!  All done! 


Thanks so much for stopping by
 
Until next time


Products used


Wednesday, July 19, 2017

Puttin on the Ritz

Hello paper people!
 
Jo here today to share with you a layout.  The Ritz collection is a fabulous collection for scrapping the men in our lives and this photo I had of my husband celebrating New Years Eve last year was the perfect photo to compliment this collection
 
 
I have used a couple of die on the right hand side of my photo and also an embossing folder for some texture on my page.
 
Here is a couple of close ups

 
I used both the 6 x 6 paper pad and the 12 x 12 paper pad for this layout.  Having the diecuts in the back was fantastic for embellishing my page.  The gold frames are also die cuts from the large paper pad.  I carefully cut the pictures out of the frames (save them for another project) and use the gold frames a decorative piece on my frame.  The top hat and clock is a stamps and emboss set.


Thanks so much for popping in.
 
Until next time


Products used


Wednesday, July 12, 2017

Male Cards with the Ritz

Hello crafters!  Thanks for joining me for another fun filled year of pretty paper!  It is an honour and very humbling to still be a part of this incredible team after so many years. 
 
So this month I have a couple of birthdays coming up.  Yep my beautiful middle child and my handsome husband!  Now most of you would know that I don't always do the masculine thing very well but having the new Ritz collection made it so easy.
 
Here are my cards
 

The gold foiling is a little hard to photograph but in real life looks fantastic
 
To make my cards I used the die cut pieces from the 12 x 12 Gatsby paper pad along with the papers from the 6 x 6 Evening Cocktail paper pad too.
 
I added a couple of dies from the collection and a chipboard piece and they came together relatively easy!
 
This paper line was so easy to create with for the men in our lives!
 
Here is a closer look at both of my cards


The gold foiling is a little hard to see but it just finishes the cards off.


Thanks so much for stopping by and all your lovely comments.  They are so very much appreciated.
 
Until next time


Products used


Wednesday, June 21, 2017

Putting on the Ritz

Another month almost gone and we are now well and truly into the cooler weather.  Perfect time to be inside scrapping up a storm
 
Today I have a layout to share wit you using the new Ritz collection 


  I love this pic of my dear nan and pop.  I have scrapped it before but it is a favourite and I felt these papers went so well with the photo.  Here is how I started my layout.
 
Using the 6 x  6 Evening Cocktail papers I chose 5 different patterned papers and cut them 3.5 inches squared.  I then matted them all onto white then black cardstock


Using the stamp from the Cubic Celebration Stamp and Emboss set I stamped onto my page.  I first penciled around where my papers would be.


I then adhered all my square mats down layered over the top of each other.
 
 
In this new collection there is a chipboard.  I love chipboard!  So many ways to glam it up!
 
Here are a couple of close ups.  Peeking out from my cluster here is the Thin Waves chipboard.  I have embossed it with some gold embossing powder.  I have also added a feather which was cut from the Deco Feather decorative die.
 
 
At the bottom of my photo is the Fanned Background chipboard.  I used some gold pigment powder mixed with gesso to colour it.  I have also tucked into my bottom cluster the Swingers chipboard.
 
All my flowers I have coloured with pigment powders

 
I have used a couple of papers from the Rambling Rose papers just to frame my page.
 
Thanks for stopping by.  Until next time
 
Products used