Thursday, March 3, 2016

Mini Album with Magnolia Lane

Hi lovely people!
 
Thanks so much for popping by today and letting me share.
 
I have had a wonderful time playing with the new Magnolia Lane range.  As soon as I got it I new I wanted to make a simple mini album using the beautiful papers as well as the matching embellishments.
 
This is an accordian mini album.


To make my album I covered 4 pieces of light weight chipboard with the gorgeous papers from 12 x 12 paper pad.  I then used the 6 x 6 for the insert as the print is a little smaller.
 
Here is a closer look  at the cover.


To decorate my cover I have used the co-ordinating chipboard embellishments and the ephemera pack.  My flowers I made using the Aster die  from the Floral Layers collection.  For a little sparkle I cut pieces from the Magnolia Lane Bling Flourishes with Pearls.
 
Here is how my book looks with all the pages out. 


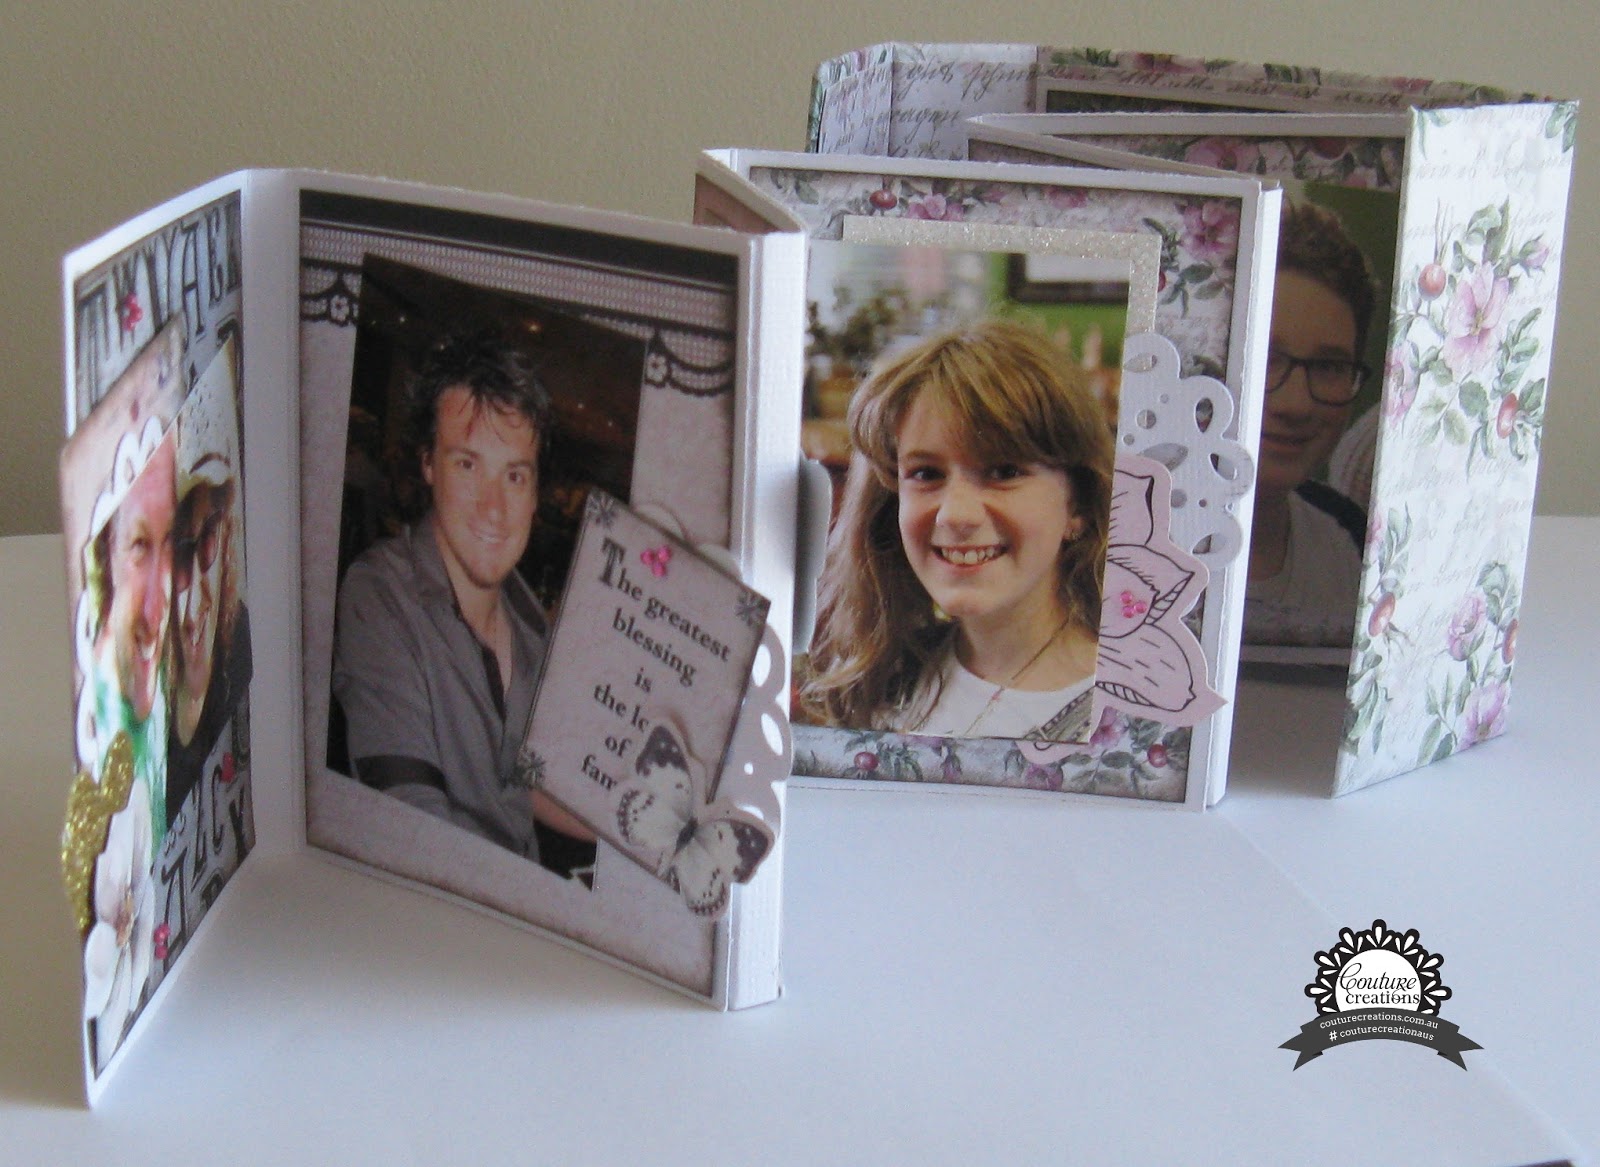
I have kept my embellishments simple.  You will see that I have used some of the florals and butterflies from the ephemera pack as well as the little quotes on one of the pages from the 6 x 6 paper pad.  The doilies from the Petite Doilies range go perfectly in my album.  Just the right size.
 
I finished off with some gold hearts cut from the nesting dies and of course lots of little bling using the 2mm gemstones.
 
I am in the process of working on another flip mini album at the moment so be sure to pop back a little later for a look.
 
Until next time
 
 
Ultimate Crafts Products Used
 
Couture Creations Products Used
 
Tools used
 
Adhesives used


Sunday, February 21, 2016

Always and Forever - Magnolia Lane

Back again this time with a layout to share.
These gorgeous papers were just calling me to be fussy cut out so that is where I started.
I then decided that while I like the freshness of the plain white background I thought it was a little stark.  So I decided to stamp it with one of the new embossing folders in the new Magnolia Lane range.  This one is called Typography.  It is a little hard to see but it just gave the layout a bit of extra dimension.


Here is a close up of those gorgeous tassel stamps  I stamped in versamark and then used gold embossing powder.  The stamp is the Magnolia Lace stamp set.  Just above it I have tucked a metal trinket.

I have used some foam tape to stick my birdcage down from the ephemera pack and also finished with a butterfly


Thanks for stopping by

Until next time


Ultimate Crafts products used


Tuesday, February 16, 2016

Adore

Hello!  Thanks for stopping by.
 
I have a little confession to make.  We all have that one scrappy item that we love and we buy heaps of.  You know - some people like flowers or hearts.  Well at the moment I am right into collecting (and hoarding) napkins!  Yep I know - crazy right?  You can get so many pretty ones from the $2 shops around locally and my cupboard is really starting to pile up. 
 
Anyway I finally got around to creating a page using my napkin stash.
 
 
I love how this turned out!  I fussy cut out my napkins and then using gel medium adhered it to my white cardstock.  I then did a little bit more texture paste.
 
Here is a close up of some of the embellishments.

 
So this has me all fired up now to pull out my other napkins and see what unique backgrounds I can come up with.
 
Until next time
 
Jo


Thursday, February 11, 2016

Finders Keepers!

Hello and thanks for stopping by!
 
I'm back again today sharing a couple of layouts I created using Amy Tan's Finder's Keeper's paper line. 
 
I must admit that this paper line is way out of my comfort zone but for some reason I found myself drawn to it when I was shopping around my local Spotlight store. 
 
The photo isn't the best quality (probably because my mum took it) but its a moment that I wanted to document.

 
I got a little messy with some distress ink and a stencil for my background and then just used a bit of a miss match of ephemera from the paper line along with some other bits and bobs from The Reject Shop.  They actually have some pretty niffty scrap supplies if you are there at the right time!
 
Here is a close up.  For some weird reason I have a bit of a thing for pineapples at the moment (go figure) so I really wanted to use it on my page.  Wasn't sure how I was going to use it but i just kind of made a bit of a cluster down the left hand side of my page.


This next layout is another one that is a little different for me too.  I really like the whole miss matched look at the moment and really enjoying using white cardstock for my backgrounds.
 
 
Yep it has a bit of pink on a boy's page but I'm ok with that.:)  I have been trying to scrap a little flatter lately.  Using all the flowers that I normally do is just taking up so much room in my albums.  For a bit of dimension and extra interest I stitched through my paper strips.
 
Here is a close up.

 
Yep -  that little boy in the first layout is now 18!  How did that happen so quickly?  And how is it that I still have photo's from that long ago that I am still scrapping??
 
Thanks for taking some time to drop by.
 
Until next time
 
Jo
 

Wednesday, February 10, 2016

Having A Blast With Colour Blast!

Hello crafty people!
 
  Well I am the first to admit that I have really neglected my little blog.  I am going to try and keep on top of it a bit more this year, tho I must admit I don't always find it easy to navigate my way around!  I find it much more easier to just share on Facebook.  If you are on Facebook feel free to friend me.  I am under the name Joanne Simons :)
 
Anyways late last year I was given some of the amazing new Colour Blast products from the wonderful Tenisha at Scrap Elegance Scrapbook Supplies.  WOW WOW WOW!  I had a wonderful time playing with these products.  They have texture pastes, embossing powders and also colour mists all in the most divine range of shimmery colours!
 
So I was given the colour Deep Water.  So pretty.
 
Here is my first layout.  I used the texture paste for my background.
 
The flowers I gave a very fine spray mist with the spray.  My frame I covered in gesso first and then again just a very fine spray withthe mist.


Here is a closer look.  I love how some of the colour is vibrant and shimmery but you can still achieve a more subtle tone too.

 
This next layout is definately a little more bolder! 
 
 I have again used the spray on my frame but also gone over it with an ink pad to give it a little depth.  The really cool thing is that the colour still shimmers through.  The text script stencil is also done using the texture paste. I LOVE how this one turned out.  Definately one of my favourites at the moment that I have done.  Think it might be the yellow and blue colours as they are colours that i don't normally use and its always good to step out of your comfort zone right?


I had some nice big white blossoms and thought they would look great coloured so again I have sprayed them.  The square chippie piece is covered using the embossing powder.


Thanks for stopping by and having a little look.  I promise I will update a little more frequently - well at least try
 
Crafty hugs to all
 
Jo

Thursday, February 4, 2016

Just Because Cards with Magnolia Lane

Hello and thanks for joining me on the blog today.
 
I have had a lovely time playing with the new paper line Magnolia Lane by the very talented Sue Smyth.  This collection is just divine! 
 
I must admit I did have trouble making that first cut so decided to make a couple of cards.
 
 
Super easy to make by layering up some embellishments and die cuts along with the gorgeous paper.
 
Here is how I created these cards
 
First gather your pretty supplies


Here is what i pick out of those supplies to use.


Here I have used the Magnolia Frame die and cut it from cereal boxes and embossed with gold embossing powder.


I then start to layer up
 
First my paper strip, then that beautiful, pink lace and then the decorative strip from the ephemera pack.


I kept the insert from the Magnolia Frame and layeredit over the top to use as a base to put my birdcage and butterflies on.


Here's a closer look at my finished card
 
 
Here's another card that I made using the same layering process.
 
 
Thanks for stopping by.
 
Until next time
 
 
Ultimate Crafts products used


Sunday, January 24, 2016

Pretty Florals

Hello lovely people!  Happy New Year!  I hope your Christmas and New Year season was filled with love, peace and good health!
 
Today I have a couple of cards to share with you.  I made them both using the lovely new Clavelina Layers dies from the new Floral layers collection.

 
Here's how I made my flowers
 
When I die cut my flowers out I tried to arrange them in a nice way on my cardstock as this was going to be used as a stencil to create the bck ground of my second card.
 
 
Once I have my petals cut, I then stamped them with a script stamp.


Using a sponge dauber and an inkpad of your choice I then gently sponged around the edges and also the centres of each petal.


I then layered them and also gave each petal a little pinch to give them some dimension.


I then added them to the front of my card.  I need some leaves to break it a little but I didnt want to take a way from the flowers so I have used the negative of the Strawberry leaf die.  Just a little bit of greenery to bring it all together.  Finished with some tiny gemstones.
 
 
For my second card I used the negative from the petals I cut for the first card to use as a stencil.  Using a couple of ink pads of your choice and sponge daubers I gently rubbed some ink through the stencil.  I added some white gel pen accents and some gemstones and finished by mounting my stamped sentiment onto the perfectly Petite Doily - Aspirational.
 
 
Until next time
 

Couture Creations Products used
 
 
Adhesives used