Friday, September 5, 2014

Couture Cards

Hi everyone! 

Today I have some cards to share with you using some of the new release dies and also the new larger embossing folders. 


For my first card I have used some core-dinations cardstock and embossed with the Great Dandelions embossing folder.  I then sanded back the top layer to show the core.


Using the Fancy Frame die from The Treasures collection, cut on from black cardstock.  I then used the 3D foam squares and loaded up the back of the frame so I could raise this off my card.


To give my card a little sparkle, using my finger, I spread some Crystalina Glitzin Glamour all over the die.  Just spread it very thinly so it doesn't warp your paper.
Finish it off with a stamped sentiment die cut with the Victorian Rectangle Nesting Dies, a blossom and also so leaves trimmed from the Lucky Tree die.  I also added a few self adhesive pearls to the centre of my embossed flowers.


My last two cards I have used the Damask Delight Paper Pad.
I embossed a piece of pink paper from the pad using the Small Dots Embossing Folder
Using the Memories Set Die I cut one out of black cardstock and the other using some co-ordinating paper from the paper pad and then cut them in half and nested them  together.


This large embossing folder is FANTASTIC for cards!  It has a few different sayings on.  It is called Sayings and is a definite must for card makers!  I embossed this on white cardstock and then using my Victorian Rectangles Nesting Dies cut out my sentiment.  I then left my paper in the die and gently inked around the edges .  Finish with a blossom and a couple of banners underneath my raised tag.


I then left my paper in the die and gently inked around the edges .  A blossom on the corner and my card is complete!


My last card, I have tucked a doily cut from the Splendour die between my papers at the corner of my card.

I have then used the same embossing folder and used a different saying.  This time I gently rubbed over the embossed area with a dauber and ink.  I then matted it on to a another piece of paper cut from the Rectangle Scallop die.


To "fancy up" my focal point, I added some chipboard flourishes from our good friends at Imaginarium Designs.  I covered them with a little gesso and then gently used a pink ink pad over the top.  I finished it off with a little rose and some self adhesive gemstones.


Thanks for popping by.


Couture Creations products used:


Saturday, August 23, 2014

School Snapshots

Hello scrapping friends!

My turn on the blog today and I have been busy going through some old school photos of my children.  So today I have 2 quick and simple layouts to share with you using some Couture goodies.  Here's my first one


I have used some bright colour papers and teamed it up with some fab dies from Couture. 

I don't really have a method as such when I create my pages.  I just start with laying down pieces of paper and then I go back and start and layer my other bits and pieces.  On this layout I have used my Circle Nesting Dies to create my circles and by nesting the bigger size over the smaller one I then get the outer circle too.  I teamed it up with the super new Cog border die.  This die is fantastic for those boy pages I find so hard to do!  Would look great also on a steam punk page too.

Of course I have a doily ( just because I cant do ANY page without one).  I have used one of the dies from the Cameo Set. and tucked it under my photo.  To finish my page I have used some chippie arrows from Imaginarium Designs.  This chipboard is fantastic as it allowed me to ink it and then run it through my embossing machine using the Fine Dots embossing folder.


Here's my second layout.


Again I have used some bright colours and I have also incorporated some circles into my layout using my Circle Nesting Dies.  I also used my black fineliner and quickly went around the edges just to make my papers "pop" a little more.  Yep, two doilies on this page both from the Momento collection.  The bigger one is Cappuccino and the smaller is from the Cameo set die.  I have also used another die set.  The long red strip at the bottom is also from the Momento collection.  This one is Chandeliers set.

Thanks for popping by and all your lovely comments that you leave on our Facebook page/blog.  I and I know all the other designers really appreciate your lovely words.

Until next time


Couture Creations Products used
CO723248 Cappuccino Ornamental Lace Die Momento Collection
CO723246 Cameo Set Ornamental Lace Dies Momento Collection
CO723247 Chandeliers Set Ornamental Lace Dies Momento Collection
CO723739 Cog Border The Metricon Collection
CO723040 Circle Nesting Dies
CO723641 Fine Dots Embossing Folder The Harmony Collection
CO721985 6mm Double Sided Tape
CO721964 12mm Foam Mounting Tape


Wednesday, August 6, 2014

Moments Mini Album

Hi everyone.  Jo here, and today I have a mini album to share with you filled to the brim with Couture goodness.  This little mini is made from envelopes.


I have used the Great Dandelion embossing folder from the Ambassador collection to bind my book.  The frame in the middle is from the Ornate Rectangle die from the newly released Van Roe collection.  By cutting it out twice from cereal boxes and gluing them together it made it a little more sturdier.  I then used my versamark pad and then embossed with gold.
The corners were also done with the same technique using another lovely die from the Van Roe collection.  This one is Elegant Square.  I then cut it in half on the diagonal to create a metal like embellishment just perfect for the corners.
Tucked in amongst my flowers is  a couple of flourishes from the Metricon Collection.  This is a fantastic flourish as it has lots of little bits you can cut off if you need little pieces to fill a space.  Its called Swirl.  Definitely one that is going to be a go to die!
You will also see lots of little leaves too.  This die is actually called Lucky Tree.  It has a long trunk on it but by cutting it off it makes another perfect filler for flower sprays, with the added bonus of being able to cut off just a couple of leaves if that's all you need.  Another die that is going to get a lot of use from me!
Onto the inside of my book.
 
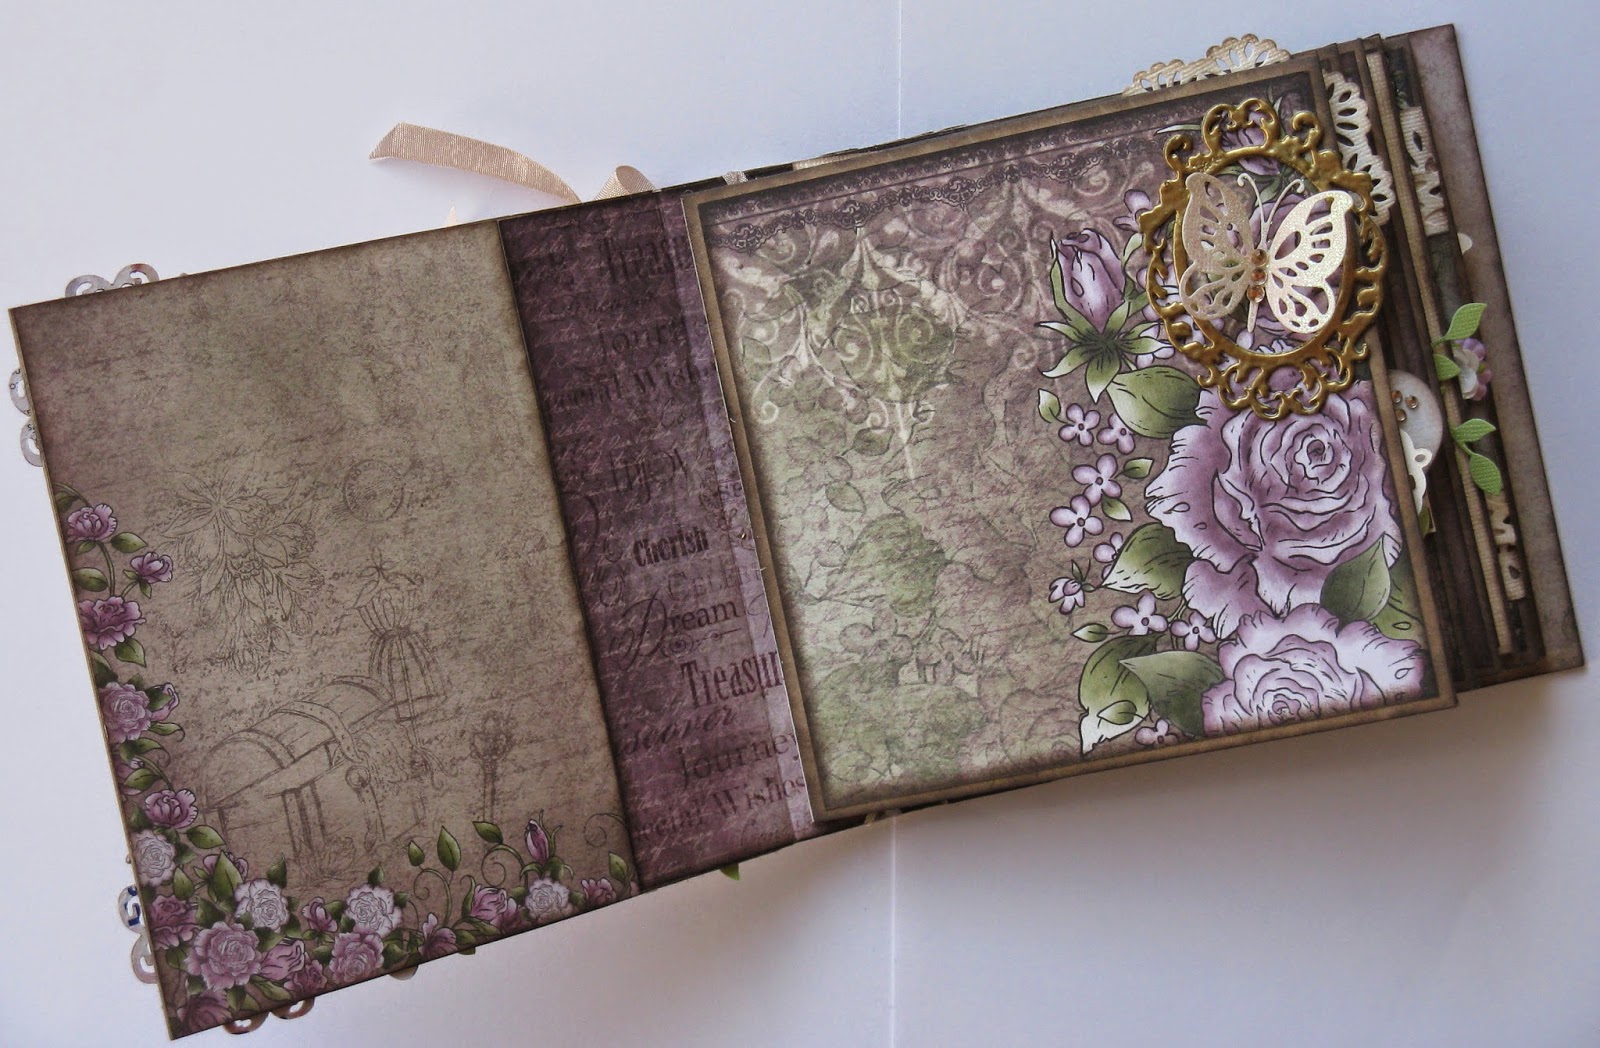
In the top corner of my book is another frame from the Van Roe collection.  This is the Royal Oval die and again it has been given the same treatment as the frames on the front.  I have popped a little butterfly in the middle, another die from the stunning Van Roe collection.  Beautiful butterfly this one is called and I have covered it with some Cyrstalina Glitzen Glamour for some sparkle and a few gemstones for the body.


 Underneath the corner of tis page you will see a doily.  That is the Mirror Mirror die from the Madeline Ornamental Lace Die collection. . I have also used an older corner flourish die from the Sophia collection.  Using old cereal boxes, I cut it out twice and then stuck it together.  To colour it I used ink and then glammed it up using my Glitzin Glamour Glitter Glue.   Using the Chandeliers Set from the Momento collection I made a strip to run along the width of my page.  I glued down just the edges so I could slip two photo mats underneath.  Tucked underneath the photo mat is another doily.  This is also from the Momento collection and is the Cameo Set.  To embellish this page I used my Heart Nesting Dies and cut out two using cereal boxes and then covered them with paper.

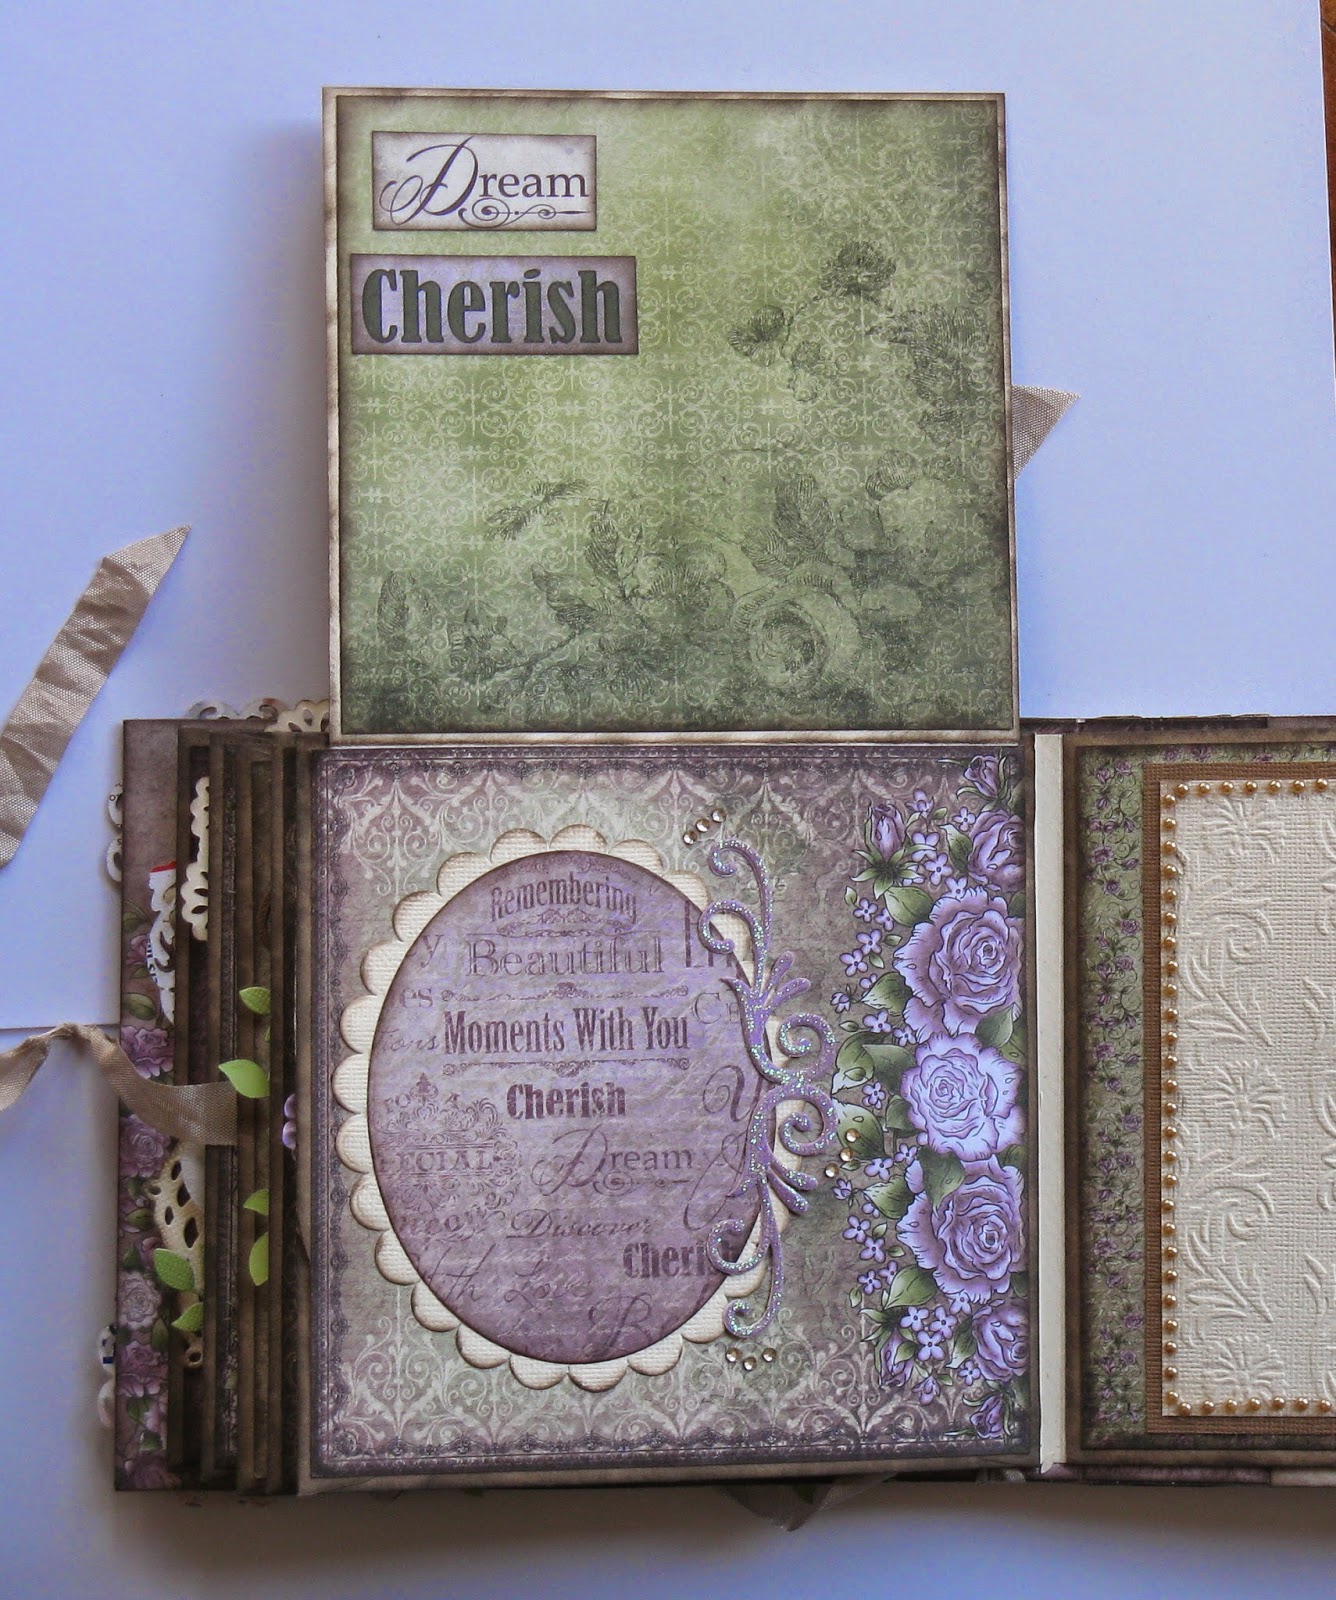
This page flips open.  Again I have used the Cameo Doily Set just to embellish the flaps of this page.  The tags have been trimmed with Chandeliers Set

For the photo mat on this page I decided to use the Cappuccino doily die and then used my Circle Nesting dies .  At the bottom of the doily is another older flourish from the Sophia collection which has also been glammed up.
This is another page that flips out to the right.  There is a pocket with two tags.  I have used the Lucky Tree die on both these pages as well as the Swirl die.

The little flap on the right has a photo mat on using the Scallop Oval and Oval nesting dies.  I then used the same flourish as on the previous page to frame it a little.
I made a little bit of a feature on the back of this photo mat (again using Scallop oval and oval nesting dies) by also using the Great Dandelions embossing folder.  To embellish the other side of my page I have used two doily dies one being the Cappuccino die and the other is Mirror Mirror.  By just adding a little glue it allowed me to tuck a couple of tags under.


This is another page that has a flap that lifts up this time.  The pretty little intricate frame is from the Metricon collection.  Its called Fancy Frame.  It is a very delicate frame but with the use of the Quick Release Paper it pops right out.  I have added another of the Beautiful Butterfly die and some more of the Leafy Tree.  I have embossed the photo mat on the other side with the Great Dandelions and added the Antique Clock from the Secret Treasures collection.

My last page again has a photo mat using the nesting dies and another butterfly.
 

If your still here after this long blog post -  thanks for hanging around and thank you for letting me share!

Until next time


Couture Creations Products used

Scallop Oval Nesting Dies CO723045
Oval Nesting Dies CO723044
Great Dandelions Embossing Folder CO723692 Ambassador Collection
Beautiful Butterfly CO723722 Van Roe Collection
Royal Oval CO723723 Van Roe Collection
Elegant Square CO723724 Van Roe Collection
Ornate Rectangle CO723725 Van Roe Collection
Lucky Tree CO723727 Van Roe Collection
Mirror Mirror Ornamental Lace Die CO723242 Madeline Collection
Antique Cock CO723706 Glamour Days Collection
Swirl CO723742 The Metricon Collection
Fancy Frame CO723746 The Metricon Collection
Cappuccino Ornamental Lace Die CO723245 Momento Collection
Cameo Set Ornamental Lace Dies CO723246 Momento Collection
Chandeliers Set Ornamental lace Dies CO723247 Momento Collection
Gemstones
Glitzen Glamour Glitter Glue
6mm Double Sided Tape


Monday, July 28, 2014

Blog hop ID and Couture

#couturecreationsaus   #imaginariumdesigns

Welcome to Day 1 of the

Couture Creations & Imaginarium Designs Blog Hop!  

We’re so excited to team up with Imaginarium Designs  sharing inspiring projects created with both our products with you this week. What could be more perfect than our Embossing Folders and Dies and Imaginarium Designs  gorgeous Chipboard designs.
Each day this week we will feature our Design Team projects and over on the Imaginarium Designs Blog they will also feature  their Design Team projects all created using Couture Creations and
Imaginarium Designs products. So loads of inspiring projects for you to help get your creative juices flowing.
We will link to the tutorials on each Design Team members blogs, please show all our designers some love and leave a comment on their blog.
We’ll be giving away Two $100  prize packages filled with Couture Creations & Imaginarium Designs goodness at the end of the week, so be sure to play along and check back on both Imaginarium Designs and Couture Creations blogs Monday 4th August 2014 to see if you’re one of  the lucky winners!
Here are the different ways you can play along with us –

Like Couture Creations on Facebook 
Share this blog post on your Facebook wall and tell us you did on our
Facebook page
 Follow our
Couture Creations Blog 
 Leave a comment here on our blog and on our Facebook page
 Follow Couture Creations on
Pinterest
Follow Couture Creations on Instagram
Hop over to the Imaginarium Designs Blog and see what their Design Team has created using their Chipboard and our Couture Creations products! They also have a  giveaway, so what are you waiting for – hop over!  oh and don't forget to follow our Design Team Blogs
Here's my layout.
I have used the teal colour papers from the Damask Delight paper pad for my layout.  You will also see some doilies poking out.  They are from the Madeline Collection and called Mirror Mirror.

The black lacy strips are one of the 2 dies that come in the Chandeliers Set  These are from the Momento collection.

My chipboard flourishes were glammed up by inking them in some teal ink and then some Crystalina Glitzin Glamour for sparkle.  My bigger flourish underneath my title was also inked but I then very gently hit it with a black ink pad.

I love love love this super sweet dress form!  So many ways this can be dressed up but I kept it simple by inking over it with black ink and then just adding a blossom and some gemstones.

Thanks for "hopping" by.  Now hop over to Tina's blog to see what beautiful creations she has in store for you.  This girl never ceases to blow me away with her gorgeous work.


http://imaginariumdesigns.blogspot.com.au/

Pop over to Imaginarium Designs Blog to see what
Don't forget to share the love


Friday, July 25, 2014

Couture Creations Creative Mag No. 4


Hi everyone
Issue 4 of Couture Creations Creative Inspiration is available NOW!
 You can pick up your FREE Copy from your local papercrafting store or you can view it online


There is some fantastic ideas in this latest edition plus the fabbo new girls on the team also have their amazing work published too!
 
Thought I would share what I created for this months edition.


Issue 4 of Creative Inspiration Magazine features Couture Creations newest releases
 
 
Until next time
 
Hugs
 
Jo

Birthday Card

 Hello! 

Just a quick share today.  I have a card that I made for a special friend's birthday a few weeks ago.  This image is coloured with my Prisma colour pencils.  Hope she likes it!


Back soon!

Hugs

Jo

Wednesday, July 23, 2014

Hey Sunshine

Hello scrappy friends!

Going back a little while ago I decided that I wasn't going to by any more paper until I had used up some of my older ones.  Yeah I know it is probably going to last until next month when the new papers come out, but it did make me pull some older paper lines out of the bottom drawer!

I have been playing around with the Hey Sunshine paper line from Kaisercraft.  Oh boy,  I have loved working with this range.  The colours are just awesome and they were just perfect for some older pics of my babies that I still had laying around! 


I love how this turned out.  All the little animals are just super cute.  Here is a closer look at the detail in the top corner of the page.


I have layered lots of paper, tags and embellishments to create this dimensional look.

Here is my next page with this cute range.


I kept the embellishing on this a lot more simple and just kept layering papers.  This is my dear little niece and nephew going back when they were little ones.  A little bit of mixed media in the corners that I'm not really overly happy with but, hey, it is what it is.

I love the look of this last one.  Just a lot of white space which is so far from my comfort zone!  I usually like to cover my pages to within an inch of its life!  I keep looking at it and wanting to spritz it or stamp some of the white space.  It is definitely taking a lot of will power to just leave it as it is.

 
This range really was versatile.  Great for boys and girls and not a flower on any of the pages.  No that's very unusual for me!
 
Thanks for popping by.
 
Until next time.
 
Happy scrapping!