Saturday, April 13, 2019

Memories, Happiness, Delightful - Dusty Attic

Hey Dusty fans!

I'm back today to share with you a layout I created for the Dusty Attic blog featuring some of the awesome industrial chipboards and scrapping a photo from my son's recent 21st.


So I'm not really much of a mixed media person. 

 I love to play but can't say I am always happy with my results.  Love everyone else's work but not my own.  For some reason I always come back to a clean white background.  So here we are again with a clean white background to start with.

I think added a strip of corrugated card to my page and distressed it a little with some gesso and inks.

I then created a bit of a cluster with the industrial border and machine parts along with some extra cogs.  I glued them together to make one big piece of chipboard that I could lay down the side of my page.

I then covered the whole piece with gesso and applied Prima patina pastes to create a weathered and rusty look.

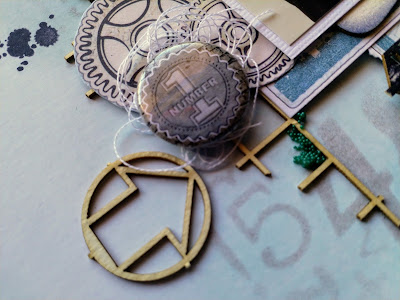
Here are a couple of close up shots.


Underneath my pic I added some paper layers and also some of the barbed wire frames.  I inked them in black and then added some hints of gold prima wax.  I also tucked under some extra cogs. 

I didn't use a title tho I'm thinking now looking at it that it may need one.  I chose to go with the wordplay chipboards.  These are always my go to and I love the pop of black on the white cardstock.

Dusty Attic Products Used


Thanks so much for stopping by, take care and happy scrapping


Tuesday, April 9, 2019

April Mood Board Challenge - Dusty Attic

Hey friends!

My turn today to share with you my take on this months challenge for Dusty Attic.

Lets check out the mood board first


So for this month I decided to use the colour palette and create some cards.

I have had a go at some mixed media this time and really enjoyed the process.


To create my cards I first smooshed some distress oxide inks onto the white background.

I then added my favourite Dusty Attic Stencil - Gradient.

Then I set about adding colour to my chippy pieces.

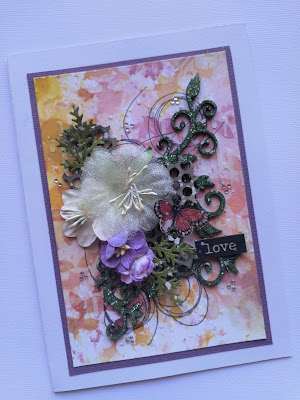
On my first card I cut pieces of the Corner Flourish no. 5 and used a glitter green embossing powder.  I then added some of the perforated mesh chipboard which I just covered with some distress inks.  I added my Dusty blooms and also the Love wordpl@y.

Here is a closer look at my first card


For my second card I started by laying the Fancy Accent chipboard on the bottom.  This was covered with some purple ink and also a tiny bit of the green glitter embossing powder.  I then added an ATC frame which I embossed twice with copper embossing powder.  I also tucked under some of the corner flourish pieces added my Dusty blooms and the Dream chipboard again from wordpl@y .

Here is a closer look at my second card


Thanks so much for stopping by.  And don't forget to add your entry to the blog.  We love seeing all your awesome work!

Dusty Attic products used


Until next time, take care and happy scrapping


Friday, April 5, 2019

Working Man - Celebr8

Hello friends!

So last week I was fortunate enough to be asked by the lovely Jenny Heaslip from Celebr8 Australia to do a guest design spot with the new line called Working Man.

I jumped at the chance as I love Celebr8 products!  The paper is so thick and  the packs they have include EVERYTHING you could possibly need to create up a storm.

Here are the layouts I created.


So for this first layout.  I used the cut apart bonus sheet from the bulk pack to add layers to my photo.  I then started tucking under the grid chipboard.  I left this natural as I liked the contrast. 

To alter my cogs I gently swiped over the top of them with some distress oxide inks, Tumbled Glass and Hickory Smoke.


For a bit of added texture I added some cotton underneath that little flair.  You only live once - great little sentiment considering they were going to the Eminem concert.  Not something you get to do very often!


I thought the wheels need a little extra texture so I added some of the micro beads/seed beads with some gel medium.  For an extra pop of colour I added the printed cogs from the cut a part sheet.


For my second layout I inked the background with some Tumbled Glass distress oxide inks and spritzed with water.  When it was dry I then used the numbers stencil in the kit and gently sponged on some Hickory Smoke distress oxide ink.


Again I used those frames from the bonus cut apart sheet to make a paper cluster for my photo.

Before adding my cogs which I heat embossed with some blue embossing powder and then gently swiped a black ink pad over the top to give it a more weathered look, I tucked under some of the grid chipboard that was left over from the previous layout.

I fussy cut the machine part from the cut apart sheet and tucked that under my paper layers .


To finish my page I again added some of the micro beads and also those little metal charms.

Seriously - this collection is just fantastic and a joy to work with!

  Thank you Jenny for the opportunity to work with some truly wonderful products!

Until next time


Wednesday, April 3, 2019

Paisley Days - Kaisercraft


Hey paper friends!

I have a quick share today for you featuring the new Paisley Days from Kaisercraft.

I couldn't wait to get my hands on this collection.  It is super pretty and I fell in love with the colour palette.  Lots of pinks, greens, yellows and with a pop of black - I just love it!

Here is what I created


I took a cut down piece of white cardstock and laid it over the top of the black and white stripe.  Before I adhered it down I used a couple of the branding strips down either side for a pop of pink.  Lucky I got two of those pieces of paper because on the back of this sheet is the most beautiful floral design just screaming to be fussy cut.

I then made a simple paper cluster for my photo to sit on from the rest of the papers in the collection.

Fishing through the collectables pack I picked out all the frames and tucked them under with a couple tags and some of the floral die cuts too.  I added in a doily and also those little arrows at the bottom.

The layout then needed something on the left hand corner just to bring it all together so I  used the frames and another floral along with that sweet butterfly to make a cluster.

I then took a few little stickers from the sticker pad and added them to my layout in various places

Finished with my favourite stamp - that little ink splodge and finally some stitching down the sides for a bit of texture.

Here are a few close up shots


Thanks so much for popping by.

Until next time